
Well here it is!! It's been a project that's been a labor of love at times, but it's finally done. Or at least as done as we're going to get it. Here's some before and after pics of our project. I have to say I REALLY loved the colors and how they turned out! So much so that after we sell this trailer I want to decorate a bedroom in the same colors and chevron. Here's the pics-
Here's a couple side by side comparisons-


So here's all the before pictures again..... We didn't do anything to the outside except buy it a new tire and rim so those are all the same.

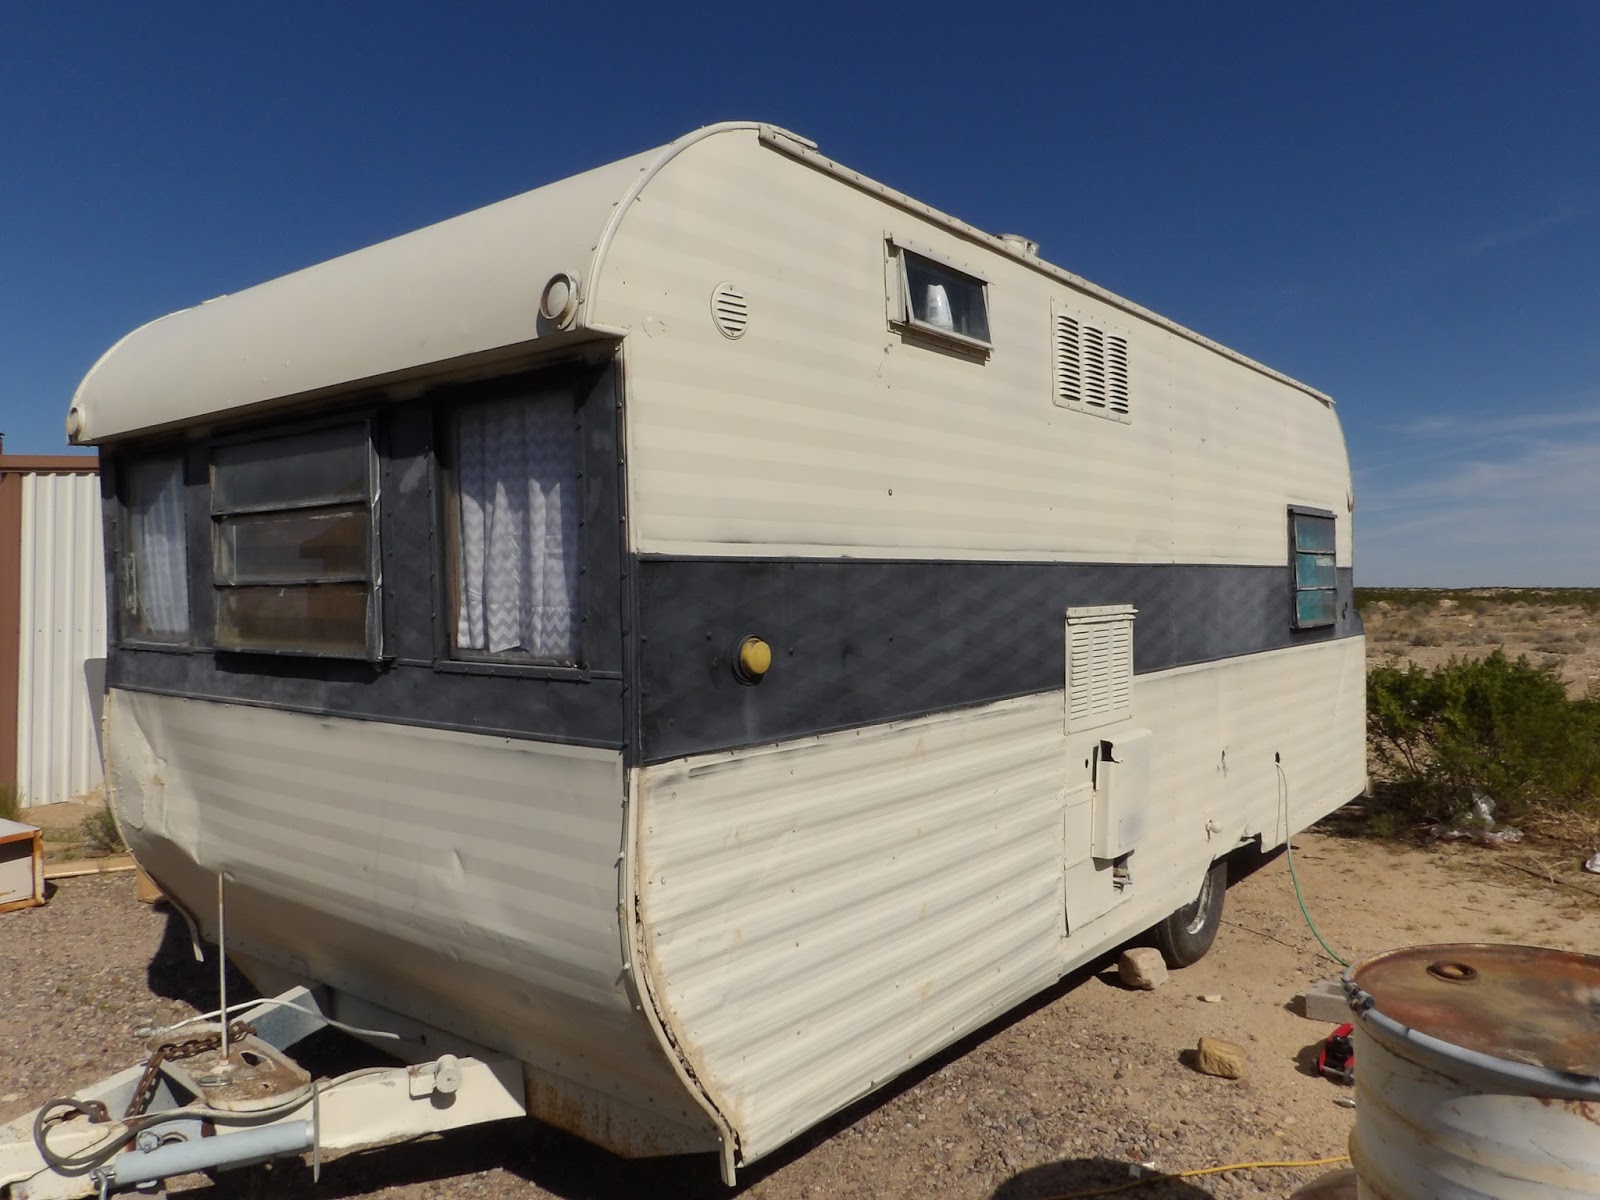

So that's the outside..... no change. Now for the inside nastiness that we started with.
These pictures were actually taken after we emptied out some of the "bonus" items left in it for us and a couple bags of trash. I wish I had gotten pics of it before- but take my word for it, it was NASTY NASTY NASTY!!! Beyond filth. Gross. Anyhow moving on..... so this is the closest starting point pictures we have.


Then these pictures were taken during the remodel which included first: cleaning, cleaning, cleaning. Trashing all the curtains and items left in the cupboards and everywhere in the trailer.
Probably a few tubs of Clorox wipes of cleaning at least.
Then painting. Once the floor was painted the smell of the trailer got 1000% better! Then I taped off and spray painted all the accent pieces- lights, heater, vent, outlet covers etc. with this Teal spray paint. (I just realized the one I used was the one that said 2X and has a picture of a lawn chair on it but this is the same color)
Floors, walls and cabinets were painted, then the back 3 walls were wallpapered. The paneling on the back 3 walls were peeling off so bad and there wasn't anything we could do short of replacing the entire 3 walls (which we lack the handyman skills to do) so the best solution we came up with was to wallpaper over them. It worked! My only regret is that I wish we would have painted them first because I didn't realize how dirty the walls were until the excess wallpaper glue was coming out and instead of being clear it was brown (YUCK) and it stained the wallpaper in some spots.
All in all though, it was a easy and cheap solution that looks pretty good (as long as you don't look too close)

These are before/after of just painting the floor.


Meanwhile I was painting the twin over full bunk bed with the same spray paint- you can learn more about that process here.

Next we put in new flooring. We got some peel and stick tiles from Home Depot that matched perfectly with our color scheme and were even one of the cheapest they had at about 48 cents each!
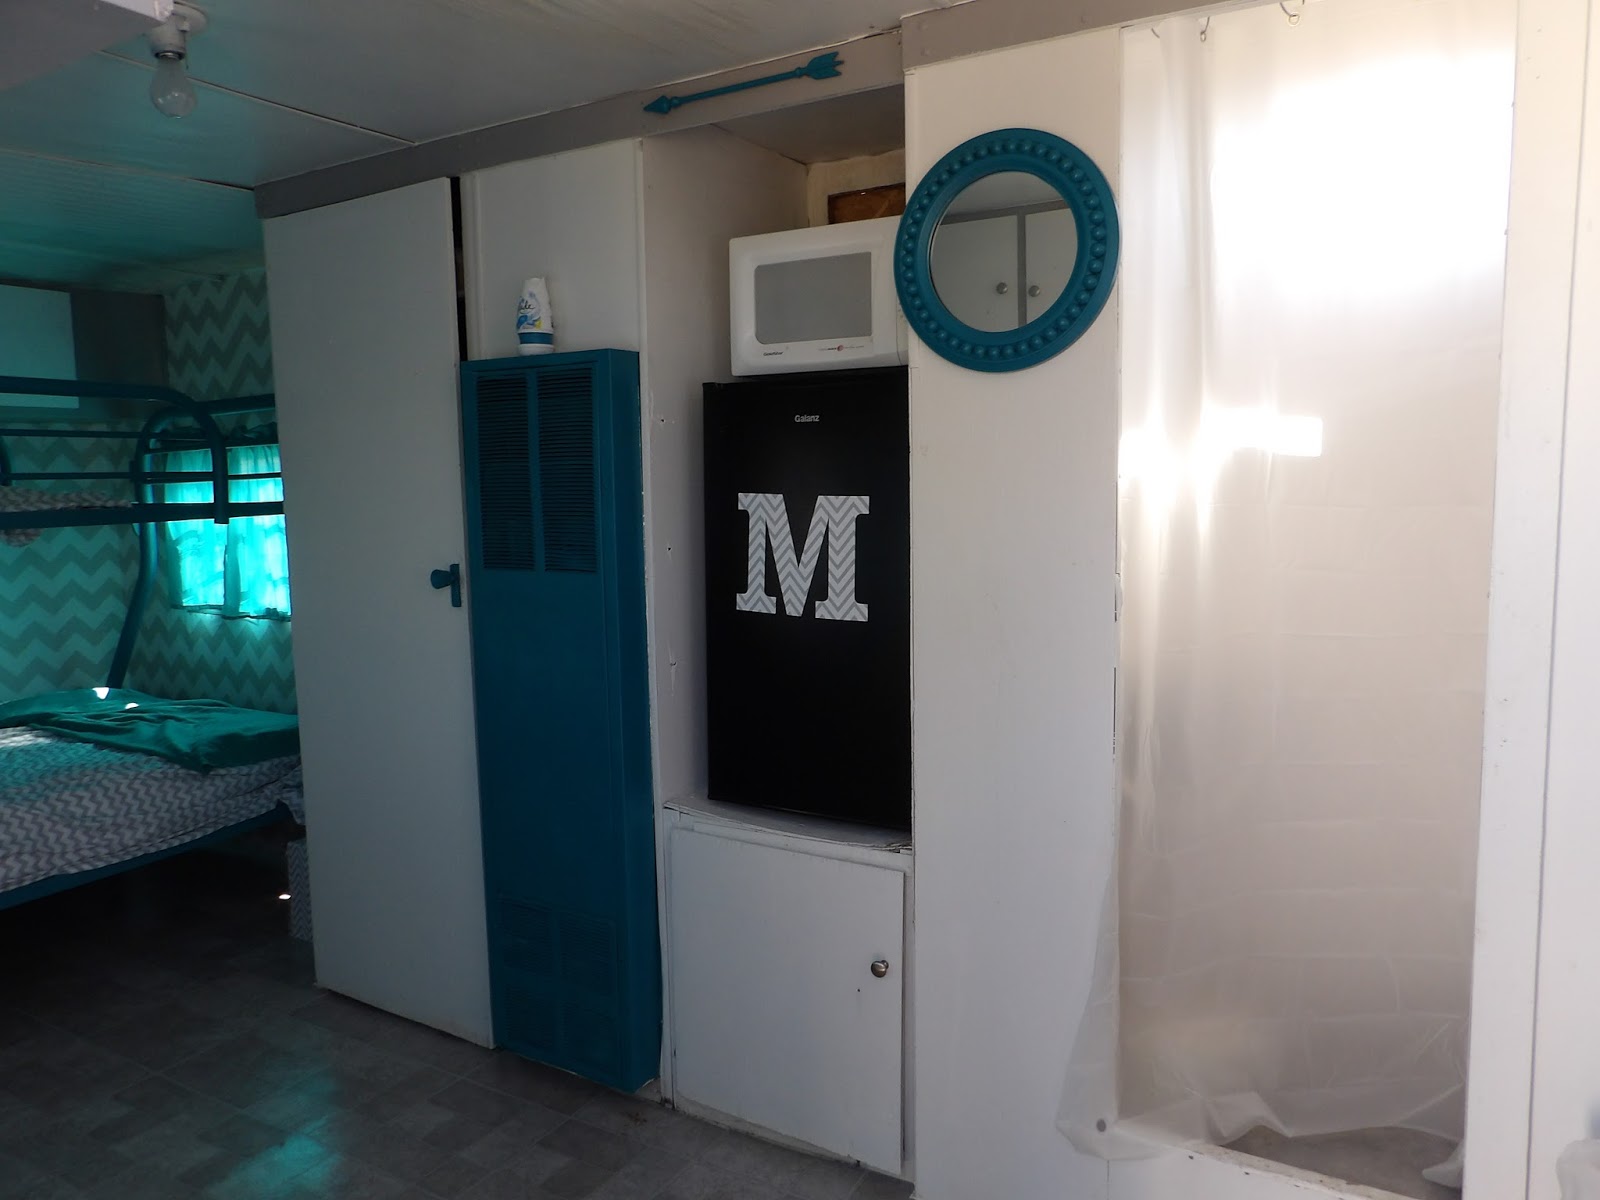
And finally everything was done! All we had to do was assemble the bed inside, sew and hang curtains, reattach all the lights and outlet covers, and finalize a few small details like lining the drawers and some of the shelves in cupboards, hanging up a mirror and a few decorations, and of course adding air fresheners, sheets and pillows to the bed :)


I even painted the door with chalkboard for the kids to color on. (notice the black finger prints of someone that didn't realize the paint was wet?!? grrrrr kids!!)
If we were going to keep it I would still probably paint the stove and sink, and there's a lot I would still do in the bathroom, but we've decided to go another route so the kids are enjoying it a bit for sleepovers before we sell it.
Wow, nice makeover. I have never seen such inspirational transformation.
ReplyDeleteThank you! It was a lot of fun to do :)
Delete